Email Designer overview
```mediawiki Navigation: Main_Page > Email > Email Designer overview
Email Designer Overview[edit | edit source]
The **Email Designer** is a powerful feature in ActiveCampaign that allows users to create branded, high-performing emails with ease. Launched in 2022, this reimagined tool prioritizes reliability and a user-friendly interface, ultimately enhancing the email campaign creation experience. Engaging customers through optimized campaigns is vital in today's marketing landscape, and the **Email Designer** facilitates that by making design simple and effective.
How to Access the Email Designer[edit | edit source]
You can access the **Email Designer** via the standard campaign workflow in both the **Campaigns** and **Automations** sections of your ActiveCampaign account. To create an email, follow these steps:
1. Click on **Create a Campaign** from the Campaigns section. 2. Select either **Standard** or **Automated** for your campaign type. 3. If you are creating an Automation, you can add an email using the **Email Designer** directly.
Please note that once you start with the new **Email Designer**, you cannot switch to the legacy designer within that campaign. To use the legacy designer, you would need to create a new campaign and select it explicitly.
Step-by-Step Instructions[edit | edit source]
To design your email campaign using the **Email Designer**, you will utilize Structures and Blocks. Here’s how to create and customize your email:
Using Structures[edit | edit source]
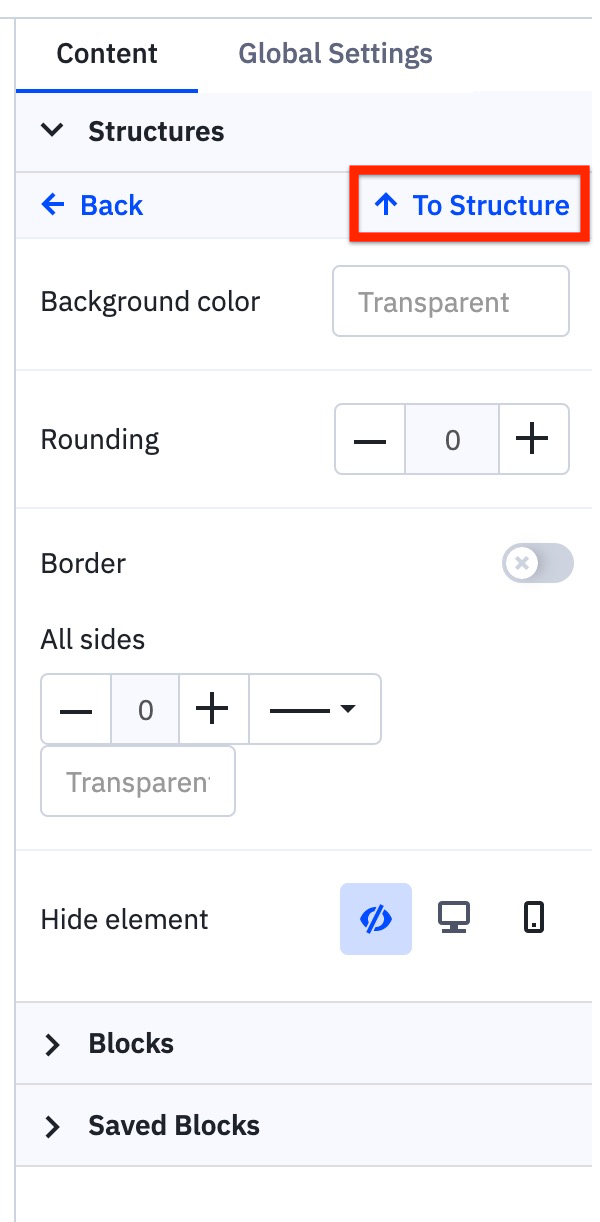
1. Go to the **Content** menu in the **Email Designer**. 2. Drag and drop **Structures** into your campaign. Available Structures contain 1, 2, 3, or 4 Containers. 3. Each Container allows for different content types, enabling creative layouts. 4. To configure a Structure, click on **To Structure** at the top of the side menu. This opens a menu to edit indentations and padding for individual Containers.
5. You can add additional Containers by clicking the plus sign (+) at the top right of a Structure. Use the equal sign (=) to adjust sizes uniformly.
Adding Blocks[edit | edit source]
Once you have placed your Structures, you can fill them with specific Blocks, which constitute the content of your email. Drag and drop desired Blocks from the Content menu:
- **Image** - **Text** - **Button** - **Spacer** - **Video** - **Social** - **Banner** - **Timer** - **Menu** - **HTML** for custom code
To customize any Block, simply click on it and adjust colors, font sizes, links, and other properties as needed.
Configuration Options and Settings[edit | edit source]
Under the **Global Settings** tab, you can edit various aspects of your created email. Here’s a breakdown of available options:
General Settings[edit | edit source]
- **Message Width:** Default is 600px; can be set between 320px and 900px. - **Default Padding:** Adjust spacing around structures (specified in pixel values). - **Background Color and Image:** Set based on the email content. - **Font:** Choose preferred fonts for your email. - **Line and Paragraph Spacing:** Customize spacing preferences. - **Underline Links:** Choose whether links appear underlined. - **Responsive Design:** Helps improve mobile views; results may differ based on devices. - **Right-to-Left Text Direction:** Adjusts text direction automatically when activated.
Sections[edit | edit source]
Customize header, content, footer, and info rows:
- **Text Size** - **Font Size** - **Link Color**
Headings[edit | edit source]
Set default font styles for H1, H2, and H3 headings, including sizes and colors.
Button[edit | edit source]
Default settings for all email buttons can be configured for color, font, and border styles.
Mobile Formatting[edit | edit source]
Options available for mobile viewing:
- H1, H2, H3 sizing - Button text size - Button width - Content margin
All settings for mobile formatting only apply to the mobile version of your email campaign.
Best Practices[edit | edit source]
- Use **Responsive Design** settings to ensure emails display correctly on mobile devices. - Take advantage of the **Global Settings** for consistent styling across your campaigns. - Keep content concise and visually appealing by effectively utilizing **Blocks**. - Regularly preview your emails as you design them to ensure optimal layout and engagement.
Common Use Cases[edit | edit source]
- **Newsletter Campaigns:** Utilize a mix of **Text**, **Images**, and **Buttons** to drive engagement and encourage click-throughs. - **Promotional Offers:** Use the **Timer** Block to create urgency for limited-time offers. - **Event Invitations:** Create visually appealing invites using **Images**, **Text**, and **Buttons** for RSVP links.
Troubleshooting[edit | edit source]
If you encounter issues while using the **Email Designer**:
- Ensure that your browser is up to date. Compatibility issues with older browsers can limit functionality. - If you can’t find specific features, check if your ActiveCampaign account reflects the latest updates. - For technical difficulties, consult ActiveCampaign support or the help center resources.
Related Features[edit | edit source]
- For information on automating email campaigns, see the Automation feature. - Explore how to better manage your contacts in the Contact Management section.
FAQ[edit | edit source]
Q1: Can I switch back to the legacy email designer after using the new one? A1: No, once you start with the new **Email Designer**, you cannot switch to the legacy version within the same campaign.
Q2: What options do I have for creating email content? A2: You can create content using **Structures** and **Blocks**, including text, images, buttons, and more.
Q3: How can I make my emails mobile-friendly? A3: Use the **Mobile Formatting** settings within the **Global Settings** to ensure proper display on mobile devices.
Q4: What happens if I don’t adjust the default settings? A4: If you don’t modify the default settings, your emails will use preset styles which may not match your branding.
Q5: Can I use custom code in my emails? A5: Yes, you can include custom HTML through the **HTML** Block option.
Q6: Are there any restrictions on email width? A6: Yes, the message width can be set between 320px and 900px, with a default of 600px.
Q7: How do I manage the spacing in my email? A7: You can adjust spacing through **Default Padding** options under **General Settings** and also by modifying each individual Container.
By following this guide, users can effectively leverage the powerful features of the **Email Designer** to create stunning emails that engage and convert. ```